First let's do the air, which is real simple:
That's it! The next one is a bit more of a challenge. |
|||||||||
 |
|||||||||
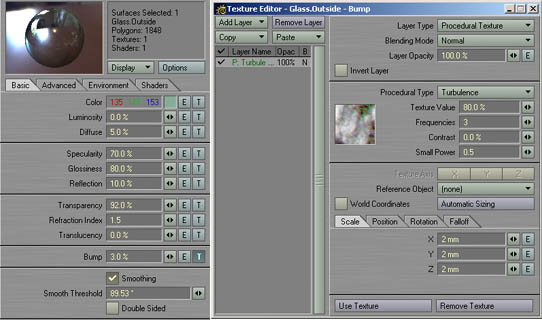
The main glass surface required some testrenders to tweak. Glass never is fully transparent.
It always has a low level of diffusion and "tints" the light as it passes through. I went for
a greenish base color and 5% diffusion. The reflection is 10% which serves as a starting value for
the fast fresnel shader. This means that at 90° the glass will have a reflection level of only 10%
but as the angle approaches 0° this value is gradually increased by the fast fresnel shader. This is
one important detail of the "behaviour" of glass that I have seen frequently overlooked. Add the fast fresnel
shader on the Shaders Tab and leave all settings at their default values except transparency. Set
this one to 10%. (this leaves a transparency of 10% at 0°) |
|||||||||
 |
|||||||||
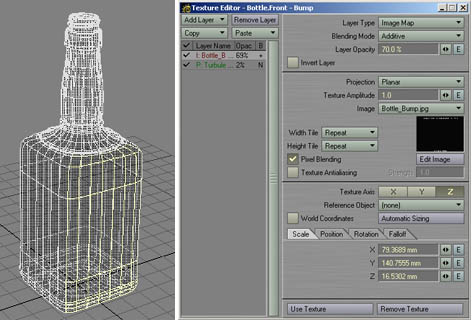
Now that we have the main glass surface finished, the writing is still missing. You'll need to select 4 groups of polys as shown in the image above (front - left - back - right) and assign surfaces to them. Name them so you will know which is which. Now simply copy the settings of the main glass surface we did just create and paste them to all of the 4 new surfaces. Next add a new texture to the bump channel and planar-map the custom bump map we created earlier on the Z-Axis for the front and back parts and on the X-Axis for the left and right parts. Change the Size X-Value for the backsided texture and the Z-Value for the lefthanded texture to negative. Be sure to have the blending mode set to additive and the texture laying above the Turbulence texture. |
| previous | next |